# Get Started
This section contains a tutorial for generating a simple GIPSIE scenario for replaying. In the scenario GPS L1 C/A and Galileo OS (E1B and E1C) signals are simulated. The receiver trajectory is chosen from a KML-file.
# Step 1: Open a scenario file
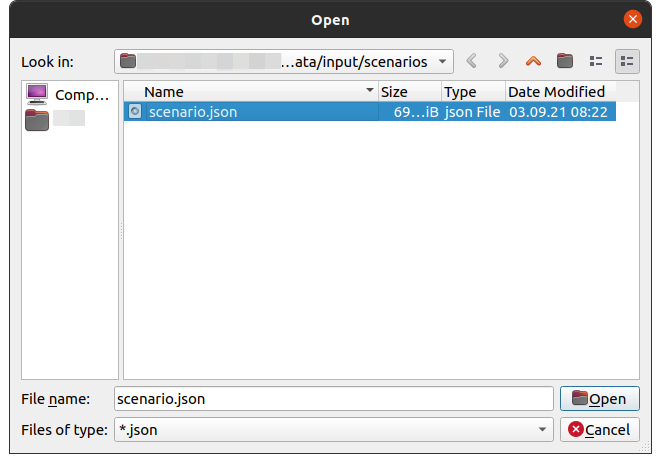
Open the basic scenario-file (/data/input/scenarios/scenario.json) for further editing.
Click in the toolbar on Open Scenario


Select the file scenario.json and open it
# Step 2: Choose Mode
Click in the toolbar on Mode ![]() to switch to the desired mode, if not already set.
to switch to the desired mode, if not already set.
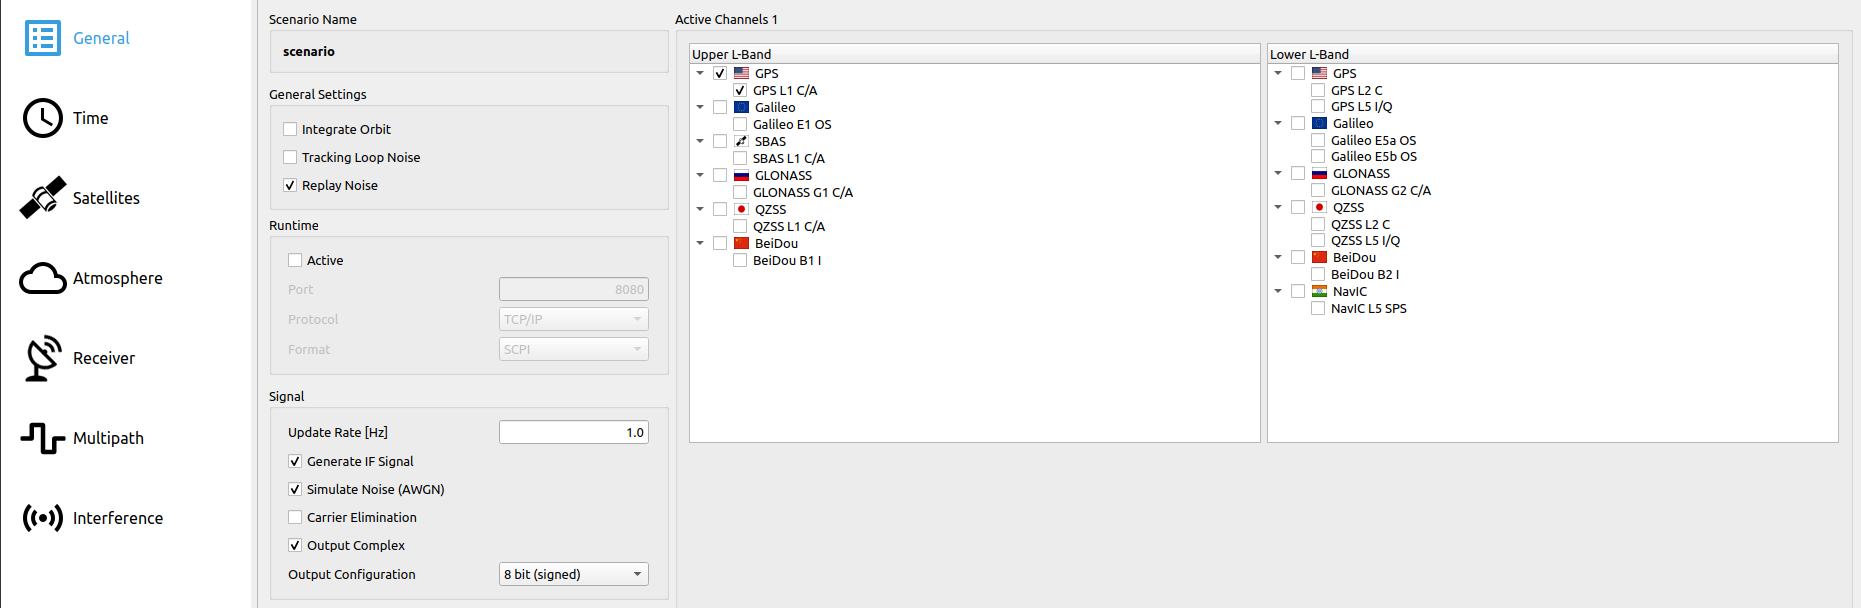
# Step 3: Set General Settings
In the section General certain parameters have to be set, depending on the chosen mode.
# Step 3.1: Set General Settings Base Mode
| Parameter | Status |
|---|---|
| General Settings: Replay Noise | Enabled |
| Runtime: Active | Disabled |
| Signal: Generate IF Signal | Enabled |
| Signal: Simulate Noise (AWGN) | Enabled |
| Signal: Output Complex | Enabled |
| Signal: Output Configuration | 16 bit per Sample (signed) |
| Simulated Channels | Select GPS L1 C/A (coarse/acquisition) and Galileo E1 OS (I/NAV data + pilot) |
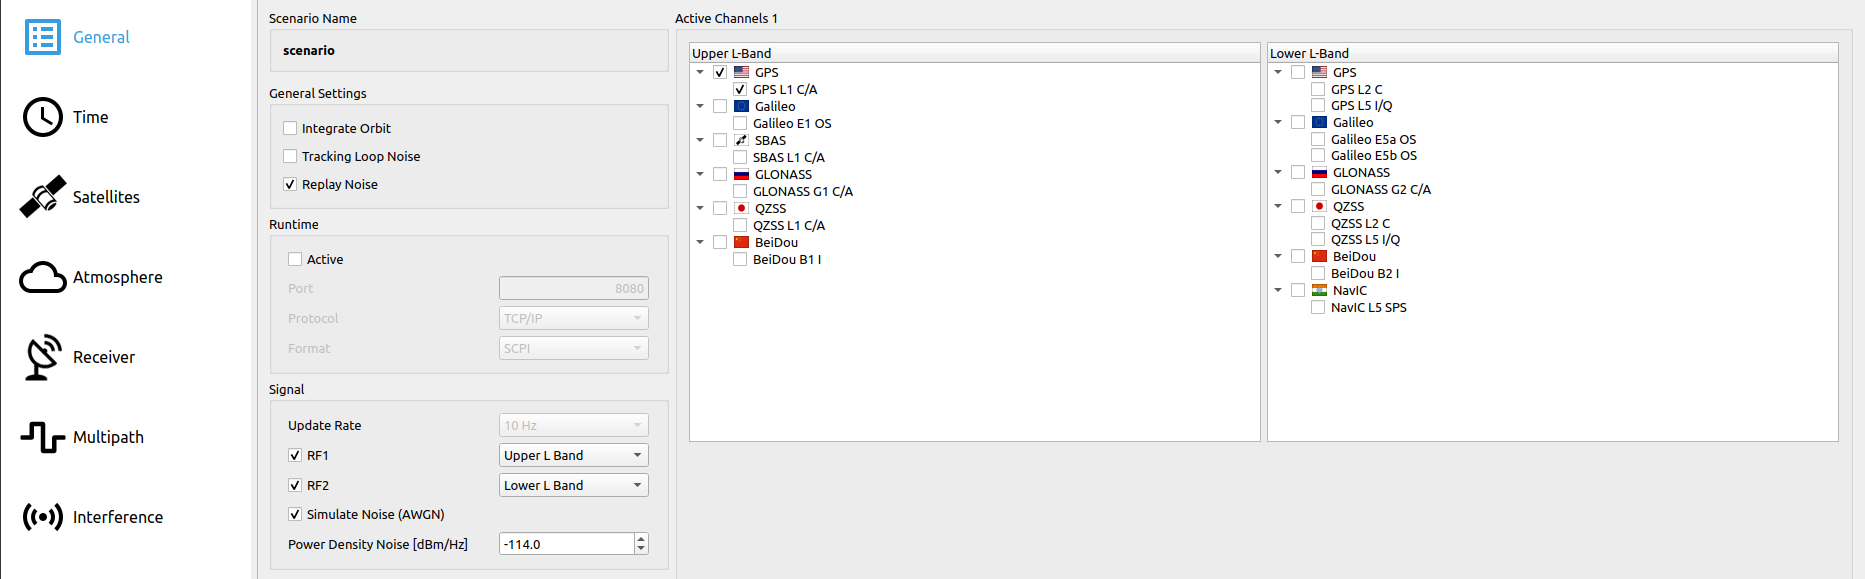
# Step 3.2: Set General Settings RTX Mode
| Parameter | Status |
|---|---|
| General Settings: Replay Noise | Enabled |
| Runtime: Active | Disabled |
| Signal: RF1 | Enabled |
| Signal: RF2 | Disabled |
| Signal: Simulate Noise (AWGN) | Enabled |
| Simulated Channels | Select GPS L1 C/A (coarse/acquisition) and Galileo E1 OS (I/NAV data + pilot) |
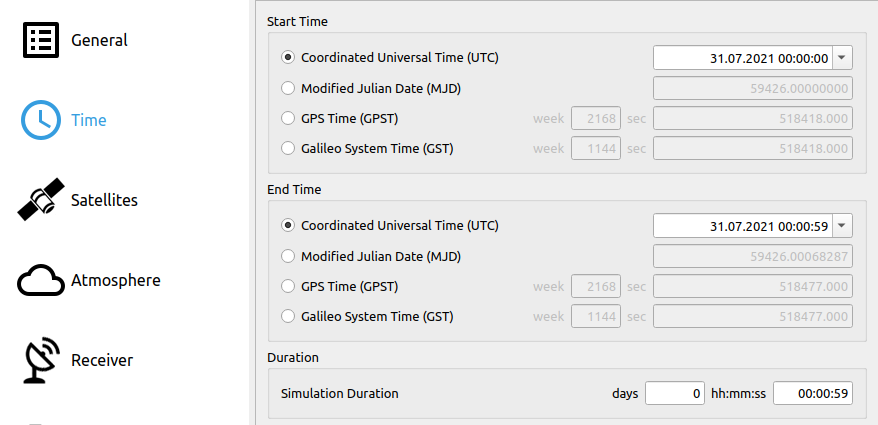
# Step 4: Set Time Settings
Set start and end time for the scenario in the section Time.
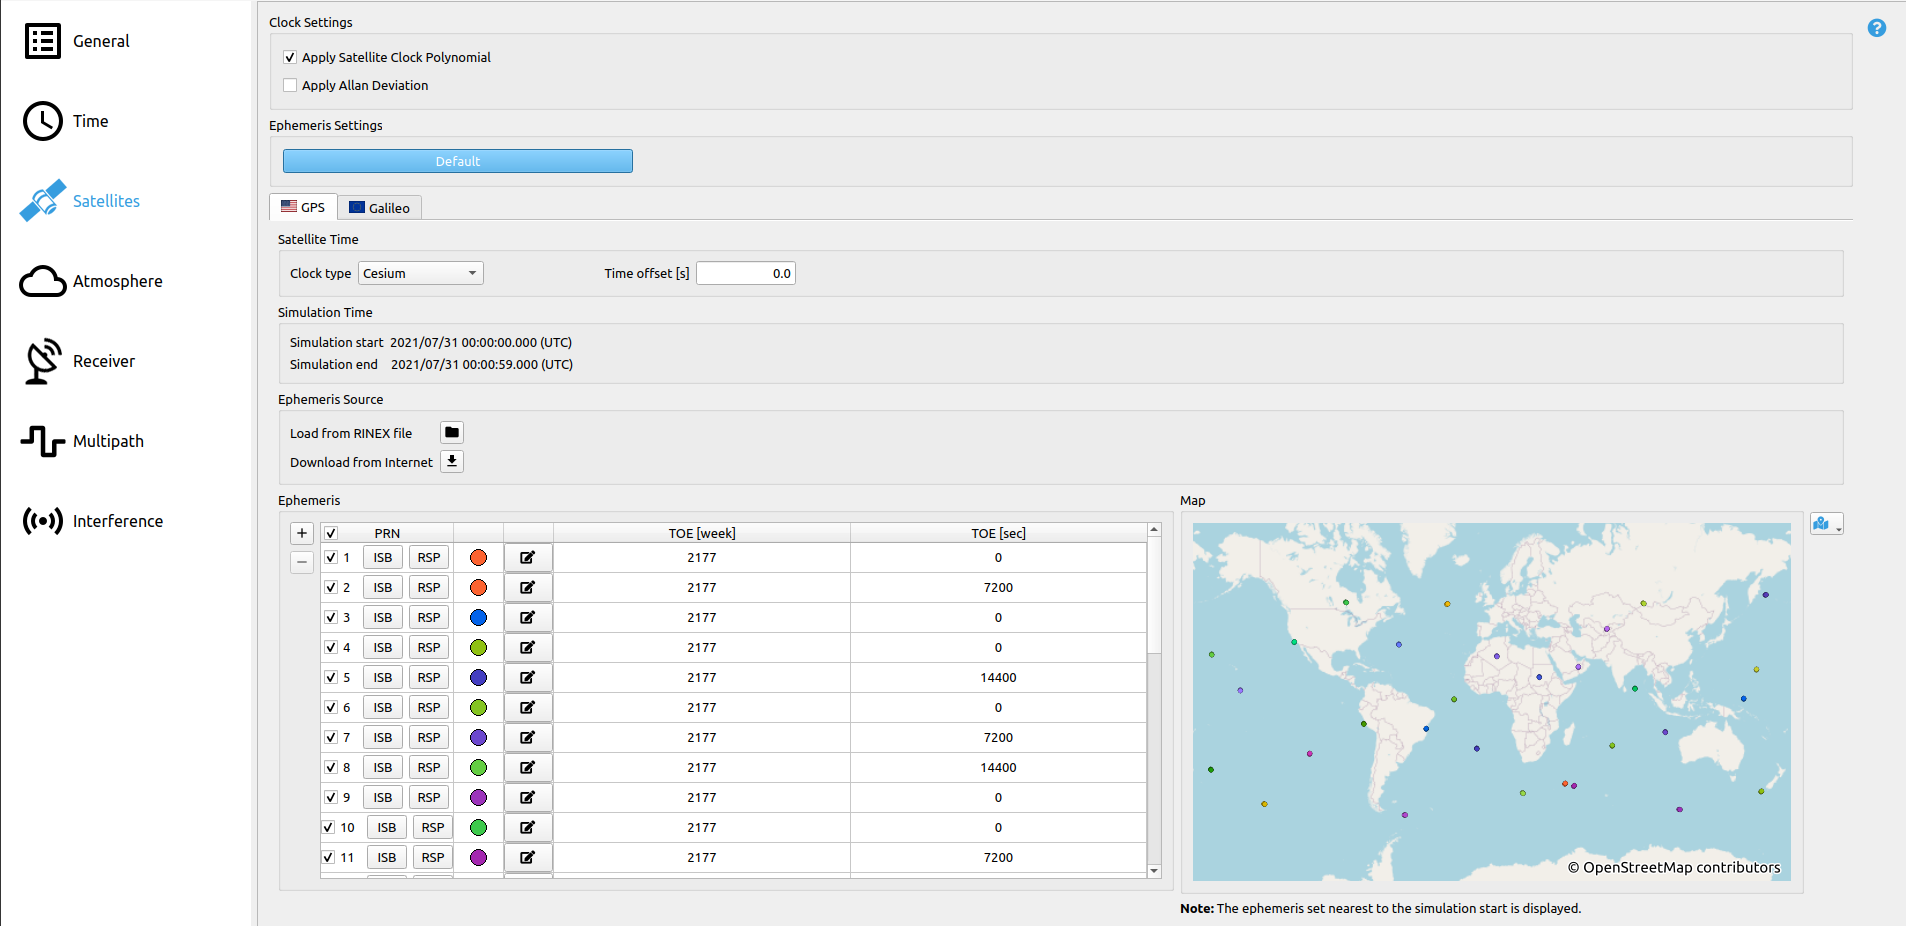
# Step 5: Satellite Settings
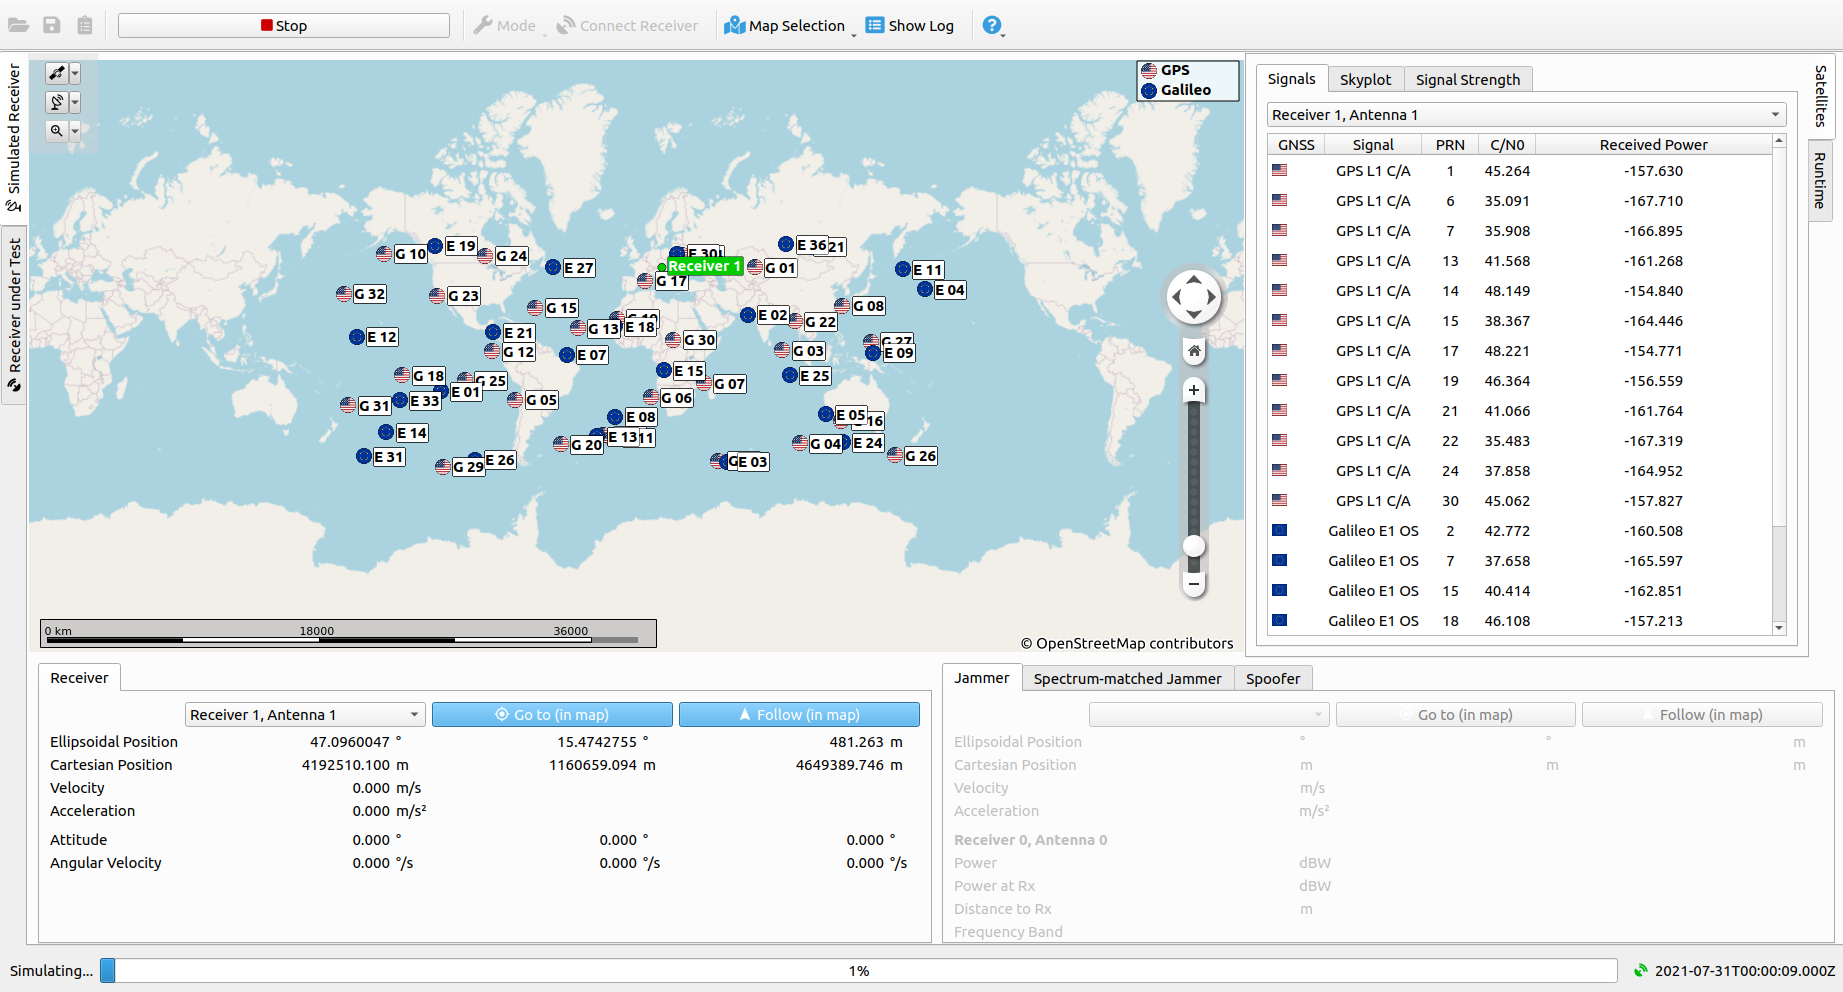
Go to the Satellites section. Ephemeris of satellites of both simulated systems (GPS and Galileo) are visible. Do not change anything here to use the ephemeris provided with the default scenario or simply click in the default button to use default constellation parameters.
# Step 6: Atmosphere Settings
Go to the Atmosphere section. Atmospheric delay, ionospheric delay and tropospheric delay are enabled. The Klobuchar ionospheric model and the Hopfield tropospheric model are selected and the standard parameters are set. Do not change anything here to use the standard settings or simply click in the default button to use default atmospheric parameters.
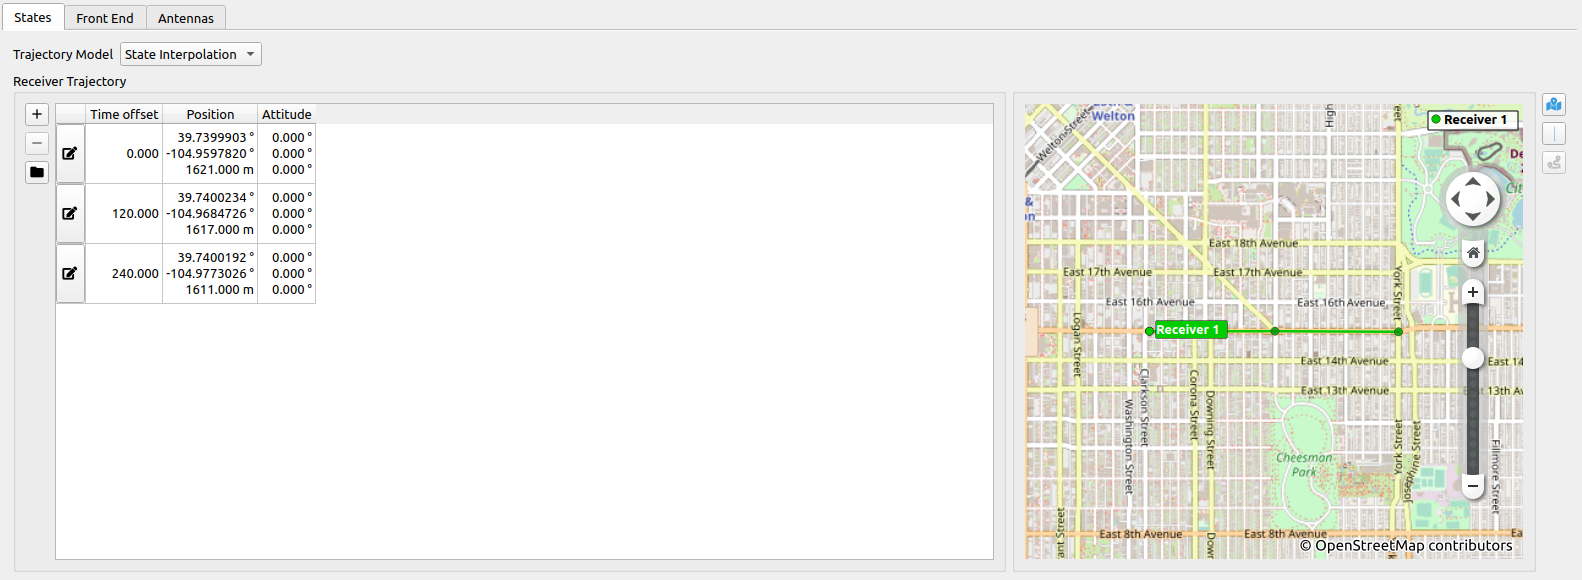
# Step 7: Set Receiver Settings
In the Receiver section the trajectory of the receiver will be set. The trajectory can be imported from a kml-file.
- In States (location of the tab is shown in the first image below) click on
 and select the desired trajectory file.
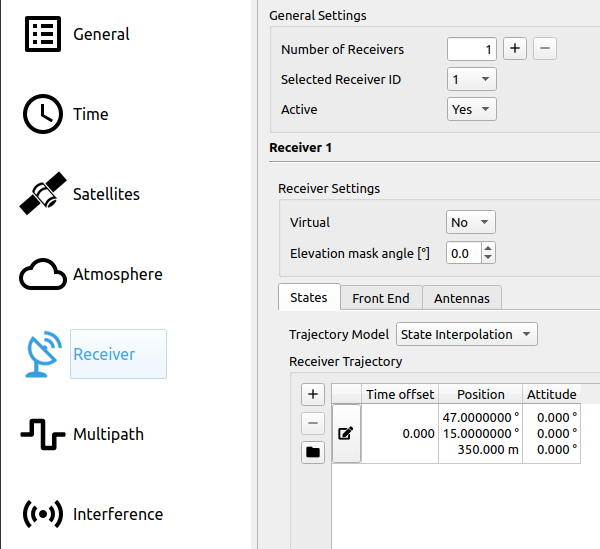
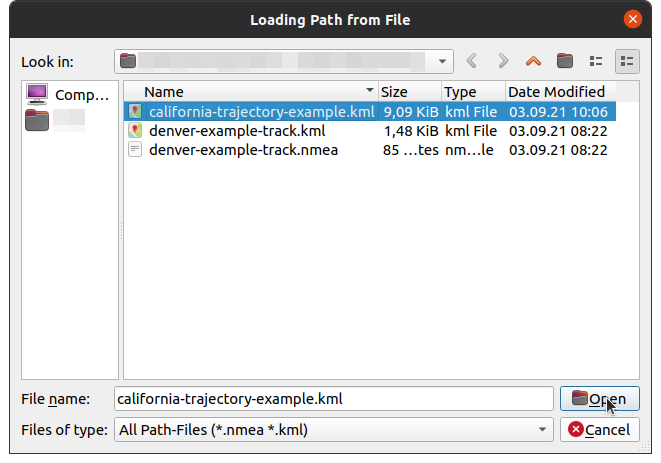
- In the table the receiver position (Latitude, Longitude, Height) and the time offset are shown. Note that the kml-file has to include timestamps (see KML for details).
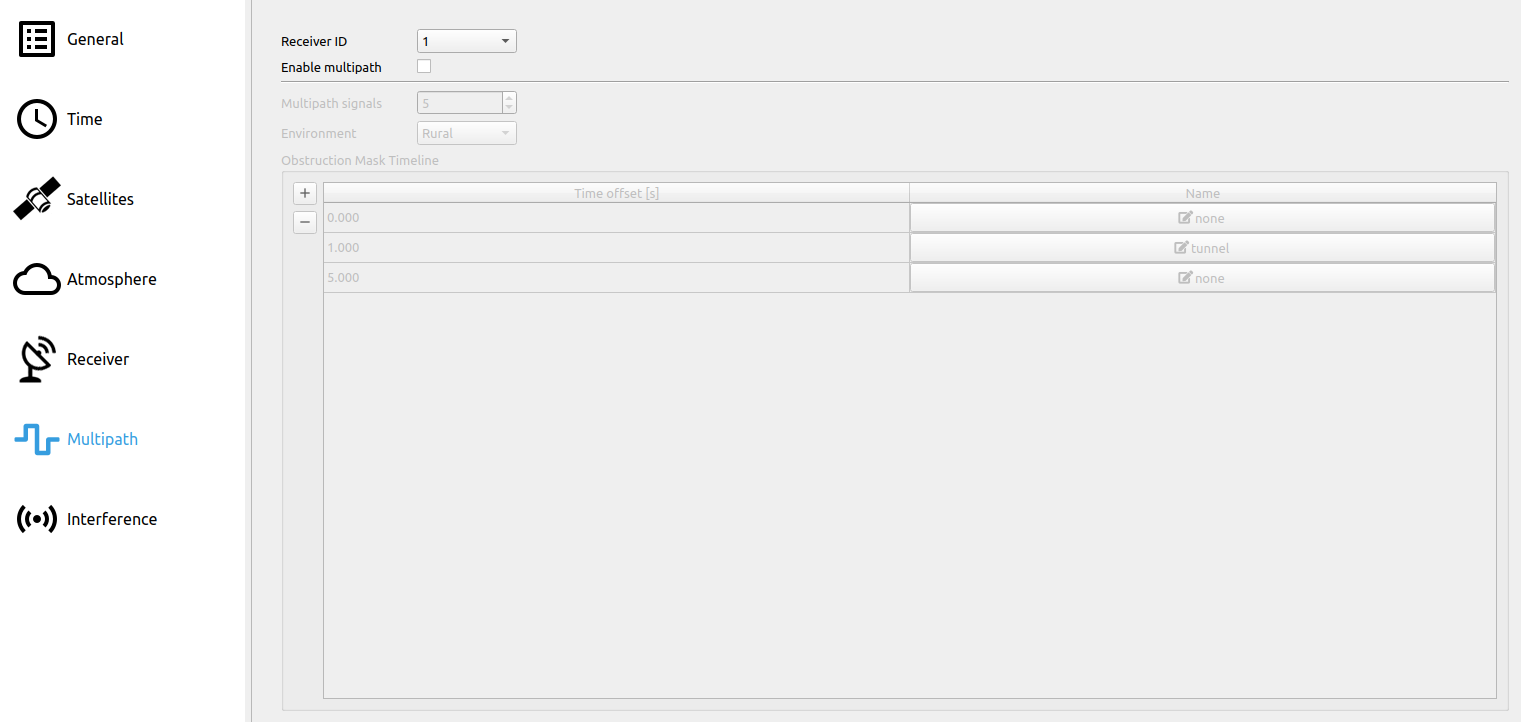
# Step 8: Multipath Settings
Multipath is disabled. The figure below shows disabled multipath settings.
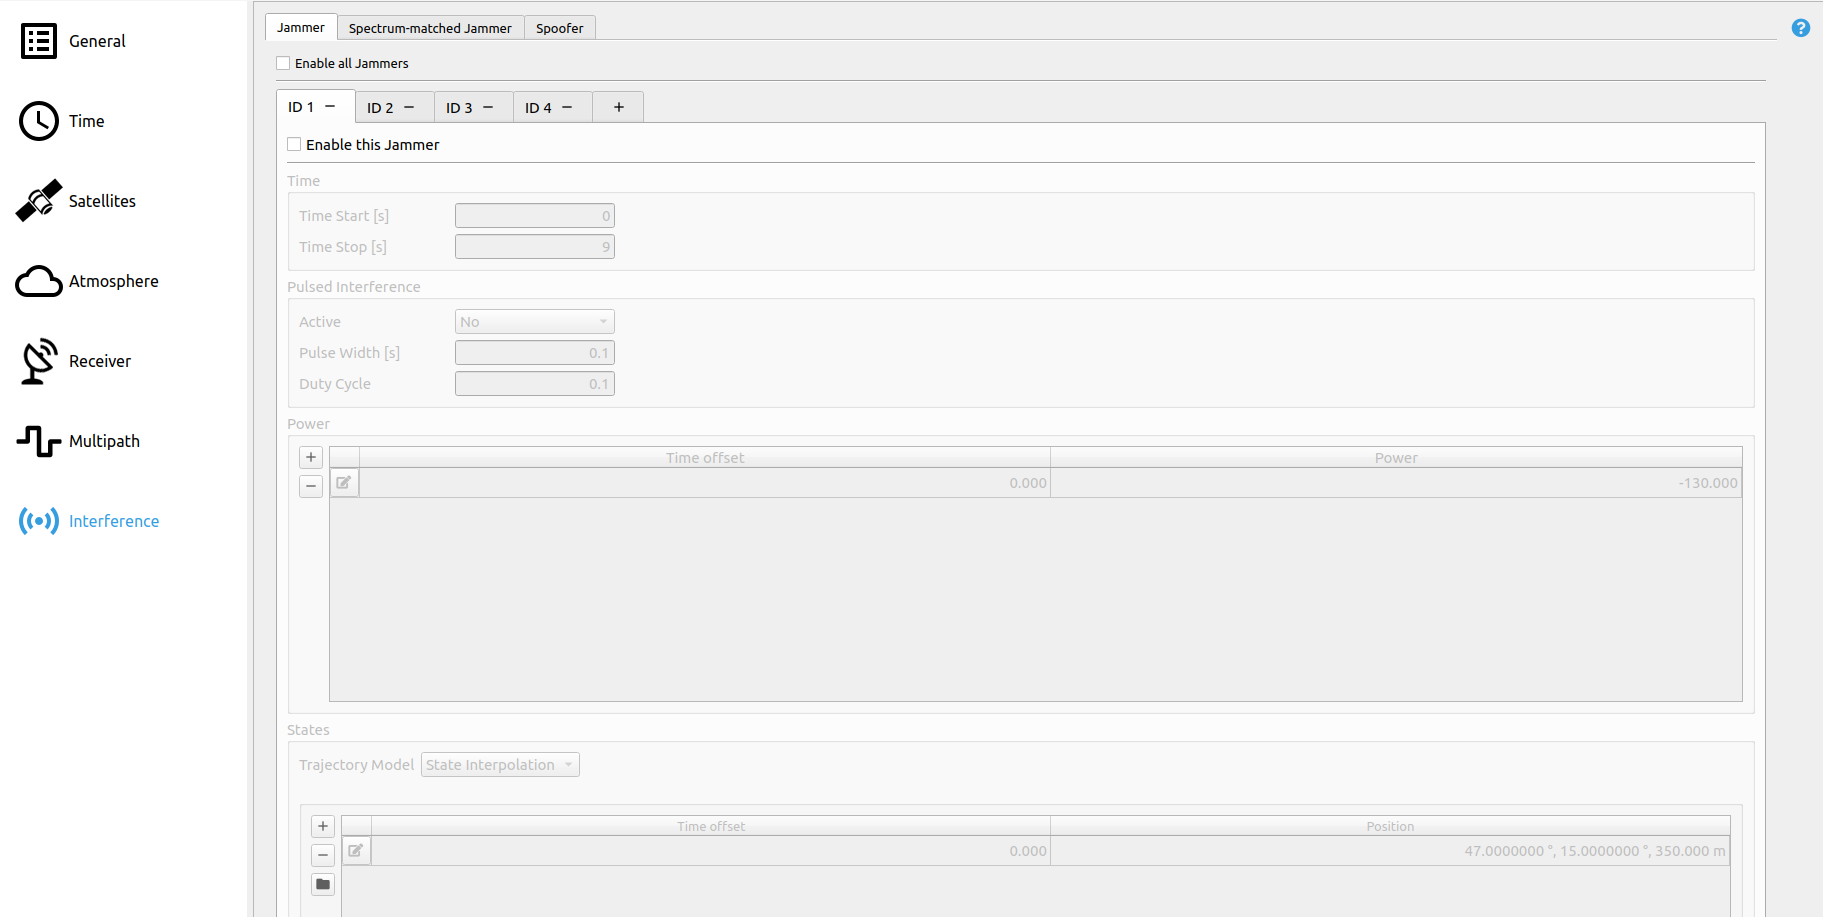
# Step 9: Interference Settings
Jammer, Spectrum-matched Jammer and Spoofer are disabled. The figure below shows a disabled jammer with ID 1.
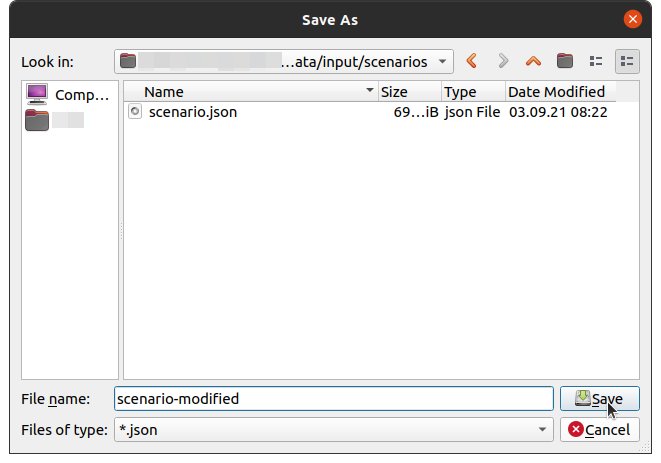
# Step 10: Save Scenario File
To make sure that your settings are available the next time you open GIPSIE, save the scenario file.
- Click in the toolbar on Save Scenario.
- Select the file path and scenario name and save it.
# Step 11: Simulate Scenario
- Click on simulate in the toolbar to simulate the created scenario file:
The progress of the simulation is seen in the simulation view:
Once the simulation has been finished, the results folder which contains the IF file can be accessed by clicking the Open Results Folder icon  in the toolbar.
Note
In case RTX mode is active, the simulation and streaming take place at the same time (real-time). Therefore, the user does not have to make any additional steps.
# Step 12: Stream Scenario (Base mode)
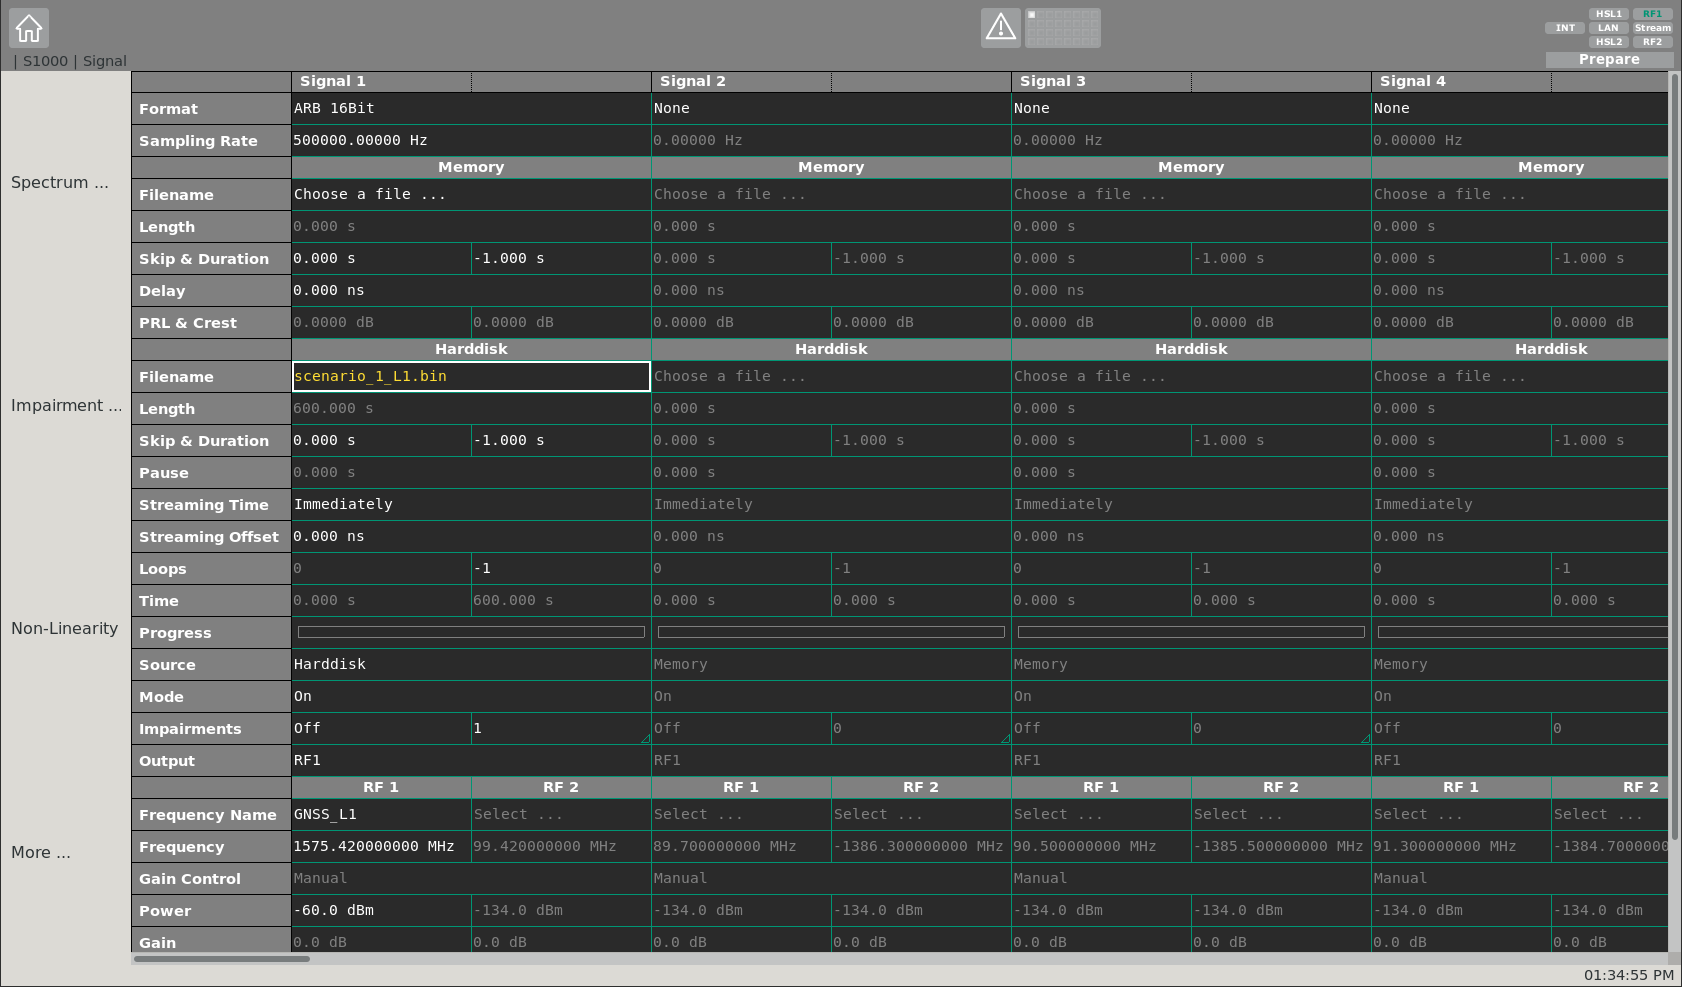
Once the scenario simulation has finished, the generated IF file can be utilized for streaming in case GIPSIE® is used in combination with the IZT S1000 (opens new window) system. For this, the IZT S1000 GUI is needed, where the IF file can be loaded and respective settings can be adjusted, fitting the scenario simulation.
For further details on how to operate the S1000 GUI see Scenario Streaming.
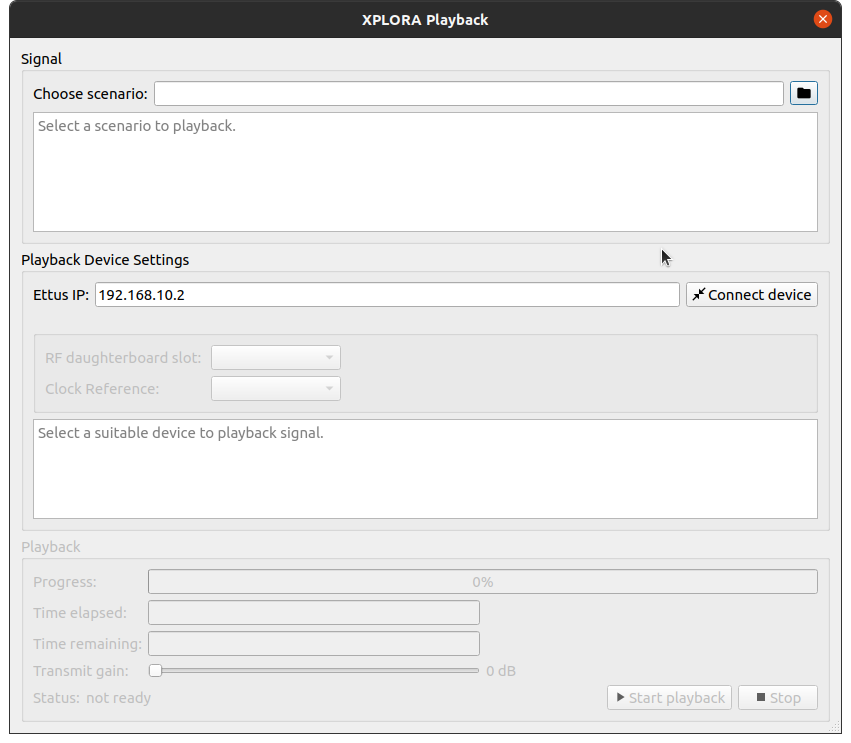
Alternatively, the Signal Playback function in combination with an Ettus (opens new window) device supporting an ethernet connection can be used as well.
For further details on how to operate the Playback functionality within GIPSIE see Scenario Streaming.